I guest posted this over at
Live.Love.Craft a while ago and thought I would share it today, just in case you missed it. Today I am going to show you how to make this fun little scrapbook album. This one is perfect for a young girl. You can use it for pictures and a journal. It would also be a fun way to remember a birthday party!
You will need 12x12 cardstock, glue, scissors, ribbon, decorative paper and embellishments. The neat thing about this book is that you can make it as little or big as you want! Today's tutorial uses two sheets of cardstock.
The first thing you need to do is fold each sheet of cardstock in half.
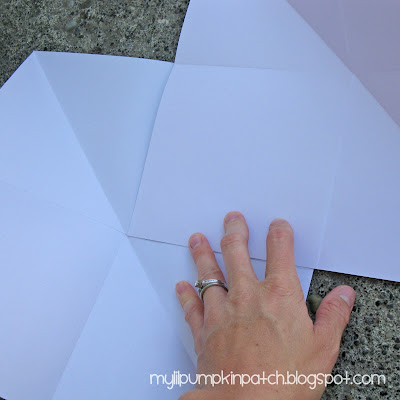
Then, fold them in half again, the other way.
This is what they should look like.
Fold each sheet diagonally (ONLY 1 WAY!).
Open up the papers and put some glue onto one of the squares that doesn't have the diagonal line running through it.
Glue it down to the other sheet, onto another square without the diagonal line. It looks like the above picture. Let it dry for a bit.
Here comes the tricky part. It really isn't hard, but I have found that some people have a difficult time with this step.
With one sheet, fold the diagonal line pieces into the center. Then, flip over the album and do the same thing (so the folds are opposite).
This is what it looks like all folded up. You will need to choose a side and direction for your front cover. You will want one of the raw (unfolded) edges to be at the right side of the front cover.
Glue a piece of ribbon onto the right side of the front cover. The length depends on how you want to close the book - either with a knot or with a bow.
In order to line up the ribbons, flip over the album with your first glued ribbon piece on bottom. Draw a line of glue and set the ribbon down over the bottom piece. Allow to dry.
I have found that it helps to smash the album in a phone book to keep it flat. If you use liquid glue, it tends to curl, and this will prevent that. The next step is to embellish! I usually cut out a 5 1/2" square for the front and back of my album. Then I pretty it up with other things. (It is optional to add embellishments and paper inside also.)
Like I said before, I thought this would be perfect for a young girl, with the butterflies, pearls, and sparklies (I am aware that's not a real word, but I like it still). I also love to doodle on most of my scrapbook creations. I think it adds a lot of character, plus, it's so fun!
I have also made these for a
girl's camp album, a bridal shower party, and as a gift for my sister.
Here are some details of the cover:
Doodling. I have found that if you use more than 1 line around the border, it looks much better! It doesn't matter if the doodling isn't perfect...it adds character!
It is fun to add lots of different textures. That's what makes it appealing!
Linking up to
these parties!