Monday, October 31, 2011

Happy Halloween!

Hope everyone has fun plans for today!  We went trunk-or-treating on Saturday and the little man loved it!  He said "trick-or-treat" and "thank you" so it was lots of fun!


This is not how I always look.  The face is supposed to be scary dinosaur.  It looks scary. I know.  Just maybe not dinosaur scary.  Maybe just weird person scary. :)

I finished my costume on Friday, and it is amazingly comfortable.  The tail feels a little weird though.  When I took it off after wearing it for a while, I still felt like I was wearing a tail!  

Here's some more pic's of my cool costume:


I whipped up this little treat bag that was inspired by one over at Homemade By Jill.


Here we are trunk-or-treating!  It was so much fun.  I like getting the trick-or-treating done in about 10 minutes!   Hope everyone has a great Halloween!
I might link up here and here.

Friday, October 28, 2011

$10 Mirror Makeover

I got to meet some wonderful people the beginning of September.  My husband met them on his LDS mission.  They are the coolest and now my best friends!  While they were staying with us, we went to a thrift-like store.  It is a store full of new distressed furniture, estate sale furniture, and lots of other junk.  The prices are usually high, but every once in a while, you can find something for a good deal.  Well, I saw this mirror for $10, but walked right on by.  I didn't see the potential, but thank goodness, our friend did.


I decided to paint it white.  I first primed it with Krylon's primer and then painted it in white (Krylon Satin White).  I won't bore you with a step-by-step, since it's pretty obvious.  After lots of coats, I distressed it with an electric sander.  I sprayed a couple of clear protective coats to seal it.


Here she is in all her beauty:


I realize this isn't the best picture, but I was sewing and the living room was a mess!  Also, I was still in my pjs.  I will try to get a better picture today!  Here's some details.  I absolutely love the top design!

I might be found partying here and here.

Wednesday, October 26, 2011

Pallet Coat Rack {Tutorial}

Today I am going to show you how to make this coat rack out of a pallet!  I actually guest blogged over at A Little Tipsy a few weeks ago, but I wanted to share it on my blog in case you missed it!


I actually only had to buy a couple of things for the Pallet Coat Rack.  I spent a grand total of about $7.  If you would like to make one, this is what you will need:

Pallet
Sander & Sand Paper
Hammer
Flat Head Screw Driver
Glue (I used Tacky, my fav!)
Mod Podge
Coat Hooks
Scrapbook Paper
Hanging Hardware
Sealant Spray
Drill and Drill Bits (opt.)


Decide which board you will remove.  I tried hammering off the board, but only cracked it…oops.  I discovered that it was much easier to wedge the screwdriver between the boards and hammer the end of the screwdriver.  This way the wood separates without cracking.  Remove nails.


I was about to try for a new board after cracking the first one, but then I decided the cracks added some character.  To keep them from splitting more, I attached a few of these flat metal brackets.  I found them at the hardware store.  They come in handy with wood projects all the time!


Speaking of character, I just love the words printed onto the board!


I lightly sanded the board to smooth the rough edges and ends to prevent splintering.  I didn’t want to sand too much, because I wanted the words to remain on the board.


See how much difference the sander makes?


To decorate the board, I used a paper pad that had coordinating papers.  I cut the paper into squares and rectangles to create a pattern.  I really like the look of bare wood showing through.  (I also thought it would be fun to paint chevron stripes.)  


After I figured out my layout, I glued everything on with Tacky glue (it works great on wood and paper).  Then, I brushed a layer of mod podge on top.


I looked for coat hooks at the hardware store, but they were pretty pricey.  (The joys of small town hardware stores...).  I wasn't going to spend $3 per hook, so I decided I would keep looking.  I found these egg stands at the craft store in the wood section.  When you turn them upside down, they make perfect hooks for hanging things!  


I spray painted them white so they would stand out from the paper and the natural wood color. 


To attach them, I drilled holes that were slightly smaller than my screws through the pallet. Then, I twisted the screws through until they were flush with the front of the board.  Then, I put the hooks on top and carefully twisted the screw into the wood.  (To make this easier, do this step before you glue on the paper - that's what I did!)

Then, I unscrewed my attached knobs and filled the hole in the knob with tacky glue and also put a bunch of glue around the inner section to stop slipping. 


Finish with a few layers of sealant spray, and then attach hanging hardware.  Fun, huh?  I made this for my aunt and she loved it (which made me very glad!)

I am linking this up here and here.

Tuesday, October 25, 2011

Toddler Tuesday #1 {Tape City}

I decided that it would be fun to post some toddler-related games and ideas for moms (and future moms).  Toddlers are so busy and need lots of attention.  I have a hard time coming up with things to keep my little guy entertained.  I bought a book earlier this year that is filled with lots of great ideas:


I will be sharing ideas from the book and others that I have found that are fun.

Also, if any of you would be interesting in sharing your Toddler-related crafts, activities, or snacks, please email me, and I would love to have you guest post!

This week's idea is a boy-idea, but could be adapted for a girl too.  I found it in the book.  It's called Tape City.  All you need is masking tape and toy cars.

Make roads out of masking tape by taping lines onto the floor in various places.  My son and I had so much fun doing this!  He has some construction accessories that we set up.  Then we had fun driving his cars around.

For girls, you could make roads for dolls to walk down.  Set up houses (or cardboard boxes) to create a little town.


Linking up here and here.

Monday, October 24, 2011

It's Monday!

I have a couple of projects going that should (and have to be) done this weekend.  I can't wait to share them next week, but they are keeping me BUSY!  Hope you all are having a fun week so far!  Come back tomorrow for my new "Toddler Tuesday."

Friday, October 21, 2011

Pumpkin Ombre Window

I have been loving all of the ombre decor.  I decided to dress up this window for Halloween.


 All I did was cut out pumpkins with my Silhouette and taped them on.  I think it would look awesome if they were attached with some foam tape, but I didn't have any.  I am trying to use what I have since I have such a large supply of crafts. (Thus the Stache Party)


I am linking up here and here.

Wednesday, October 19, 2011

Fall Doorknob Decor

I am going to show you how to make this super easy and cute fall door decor today.


 These are the supplies you will need. I had everything I needed on hand, but if you need any of the supplies, they are very inexpensive.


 You will also need some cardstock and letter stickers.  As you can tell, these are scraps and leftovers. :)  Thank goodness I could spell out the word "fall," since they are almost gone!  If you don't have stickers, you could cut out letters or even draw them on.


 The first thing you'll need to do is cut a piece out of the hanger that is approximately 12" long.  You will be bending it into the shape of a pumpkin.


 I started bending at the stem.  I used pliers at first, but then discovered it was easier to do the bending with my hands.


 Next, I took some floral wire and began wrapping it around one of the raw edges of the stem section.


 I wrapped the wire around a whole bunch of times and connected the two raw edges to make one continuous line.  It doesn't have to be pretty, because this will be covered up in the end anyway.  Just make sure the two ends are held together well.


 Put a dab of hot glue on the wire and start wrapping your jute twine.  I found it easier to cut a big piece of twine, instead of trying to fit the whole spool through the opening.


 Just keep wrapping, wrapping, wrapping (I may have seen Nemo too many times...Isaac loves it).  I hot glued every 1/2" OR when the twine started to slide.  I also wrapped the twine loosely but pushed it close together so it was fatter to add some volume.


 Next I cut out some pennants (can be done with Cricut, Silhouette, or by hand) and stuck my "fall" letters to them.  I decided to make the black a little bit bigger to create a nice border.


 I tied a bow and then glued in on to the bottom right corner to balance things out and add some more color.


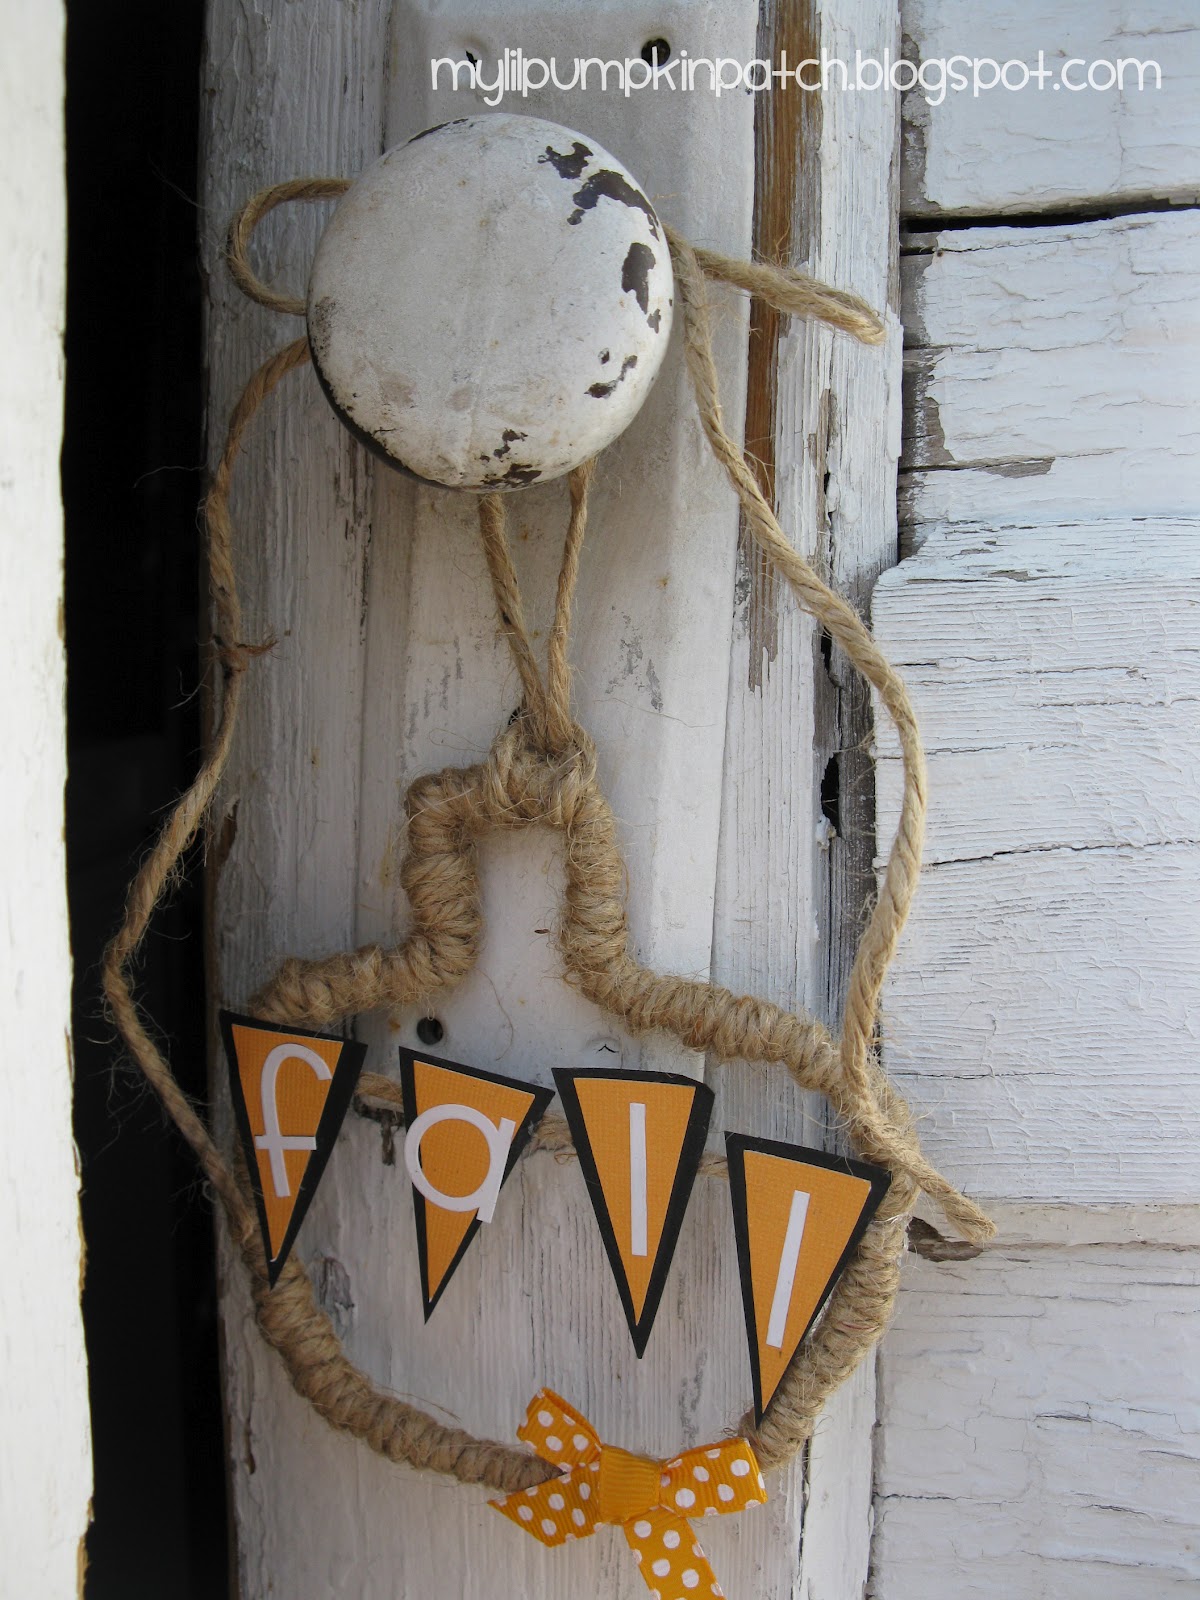
 I decided to use a piece of twine to hang this on the door knob.  Just take a long piece and loop it through the stem of the pumpkin.  It is better to make it too long than too short - you can always trim!


Tie the twine in a bow around the top of the doorknob.


Isn't it pretty?  I think it adds such a fun touch.  It is so simple and so easy!


I will be linking up here and here.

You May Also Like:

Related Posts Plugin for WordPress, Blogger...